fighting procrastination fifteen minutes at a time

Tag: planning (Page 2 of 3)

??Reference Material – RhB metre gauge, Switzerland

There is some great footage of operations on the new tunnel construction at Preda on the RhB. A couple of new found channels that I have added to my watch list. Now with HD content and the ability to not only see things in great detail but also to grab ref pictures from these videos it makes researching a current prototypical location a doddle. In this first video I particularly like the attention to the unglamorous. It’s so easy to see the trains going by but as I’ve said previously it’s the stuff away from this I’m interested in. In the future this will probably by of most interest to historians.

Up next is some footage of everyday movements showing many different consists that could be modelled. Great quality too.

I have realised that I can create a playlist on YouTube specifically for my RhB viewage. I just need a way of cataloguing this ever growing backlog of material but then I can’t complain about watching footage of the Rätische Bahn.

One day I hope to go to Switzerland and take my own reference footage.

Until next time..

Days Out – 2018 Seven Valley Railway Gala

It has been over a year since I visited the SVR for it’s annual autumn steam gala with my friends and again we took the walk through the xx country park ending up at Hampton Loade where we watched trains and ate cake. The was a star studded cast of locos with Britannia in the leading roll. There was also Royal Scott and the recently rebuilt J22 amongst others.

It was a beautiful autumnal day with distant whistles and the exhaust bark that could be heard up and down the Seven Valley.

Many photos were taken for reference such as tress and the general landscape in wonderful autumn colours. As I’m away from home I am absolving myself from 15minutes as I’m doing prototype reseach. I’ll post a short video once I’m home of locos going past!

Until next time..

Layout design drawing (1)

In a brief lull in this mornings schedule and a cheeky fumble on YouTube I came across this video of recent traffic movements with some interesting lash ups. It lead me to doodle up something that’s been in the back of my mind for some time and originally was going to be a narrow gauge logging layout. However in this iteration it is transported to the Swiss Alps and is a fictional RhB location. It’s certainly not the first time this noodling has come up and I’ve a couple of posts about this but I thought I would use the blog as a bit of a scrapbook to look back on long after the paper has been chucked or the digital doodle has settled to the bottom of the pile. I may mock this up at some point..

Until next time..

Pressure valve(s)

Some times life throws curve balls and things don’t go according to plan, see last weeks post, and it seems as though I’m running in treacle. I did go upstairs and sit down at the modelling table but I just felt I wasn’t doing something that I wanted to be doing and just doing it for the sake of doing something. Maybe this is important but ultimately one has to feel like one is enjoying it. So this last week I have tinkered with a number of kits but I’ve been distracted by a number of things not least the gogglebox in this case Youtube. I started off looking for some info on soldering white metal kits and went down the rabbit hole of home casting. I have a 009 narrow gauge kit that I told a friend I would build and without too much exaggeration it is probably a year since I made that commitment. Now the fly in the ointment is that it must be decades since I last took a soldering iron to one of these stress inducing box of bits. I remember the first time I endeavoured to join even to bits of white metal together and ended up with a pool of molten gloop. This didn’t inspire courage or progress in this particular brand of model building and since that day I haven’t touched said white metal in any shape or form. However not one to shirk ones duties I decided to look up “effective white metal soldering” on the Toob to see if I could take the box of bits given to me and turn it into a reasonable rendering of a Bagnall loco. After watching these videos I decided the best course of action would be to get a sacrificial goat and test out my skills before committing to turn friends prized possession into another pool of crud.

Now some of the inactivity was down to the fact that next weekend I’ll be going away for a bit of a jolly to Wales to stay with friends and as is custom we will go an visit a railway of some shape. They are pretty much a cats swing from just about any railway related attraction in Wales and so quite often going down there provides a dilemma to which we should visit. Next weekend there’s a Gala at the SVR but I’m not totally sure of the itinerary yet.

So what of the fifteen minutes a day? Well I am in the process of building another baseboard to put a micro layout on and that will be the focus of my efforts for coming weeks until I can get room sorted out. Oh yes and then there’s the white metal kit and a track plan for that.

I’ll leave you with another sneaky peak at another stock roster for the up and coming layout on the last run home..

Until next time..

Looking for detail.

In preparing to build layouts in my mind I like to have a clear picture of what I’m building and in order to do that what is needed is copious amounts of detail. In this day and age there is a plethora available to us modellers with access to the internet. However this doesn’t always conjure up the necessary facts, so the only way to combat that is “boots on the ground” as the military likes to say. For this factor I guess that’s why we model what’s close to us and not something halfway round the world although many do now with the help of the interwebs.

I have long been interested in the architectural aspects of layouts and the buildings on them. I think what started it off was seeing Pendon Museum and Chiltern Green at a very young formative age. I think it set me on the path of modelling the train in the landscape.

Step forward a number of years and I came into a copy of John Ahern’s Miniature Building Modelling, then it really started to grip and I started to collect more modelling books on the making of buildings. The library grew and grew then with the advent of video the collection of dvds started.

This helped with the modelling I wanted to achieve but I wasn’t happy with the final outcome. I wasn’t sure what was missing until I found the book on prototype modelling by David Jenkinson and everything changed. I could see that using a real location was how one gets realism. I have a feeling that the modellers and layouts I admired also appreciated the landscape first along with the railway and there’s plenty of examples that I can call on as evidence like Ditchling Green, Totnes and Yaxbury to name a few.

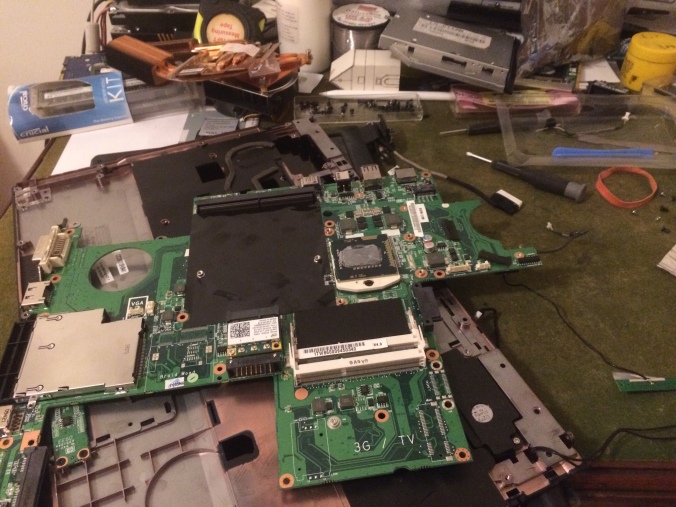
Now to the picture, not the best conditions but then it’s detail I want and not lighting effects. There’s plenty of reference around me and I also feel that a lot of the time when we are out snapping we are missing the mundane and that’s the important part for me. All the pics we take usually are pointing at something that’s attracted us like a landscape or an event but how often do we think of the things that we don’t look at. This is what I’m setting my mind to now as collecting the periphery is just as important as it was back in the mists of time. I think of the pictures from the beginning of the century and due to cost and the technology available we were lucky to have as many pics as we do. Now living in an age where the majority of us have a camera in our pocket there’s no excuse to record the minutiae.

So I’m now building my vernacular picture archive for data I’ll need to create the scene I want model in a future layout. I’m going to spend a bit of time traveling around my locale snapping away at anything that interests me. I have a bit of a thing for run down out houses and sheds and anything quirky but that’s another story.

Until next time..

Room with a railway

I have finally got round to starting to sort out my Railway space and it is a bit strange having an empty room like the day I moved into it. In order to be able to carry out some proper modelling I decided that this needed to take over other modelling progress just for the moment as I really like and need a organised space to work in and around. First up was emptying out the room ready for decoration as the above picture illustrates. Colour decided, check, I have to go to the local paint shop tomorrow and get my preferred colour. The very friendly gent who spent some time with me when I first went in explained colours and approach to painting which was very useful as it must decades since I waved a paint brush around in anger and he advised that one tin should to the job and if not a tester pot should finish it off.

There are a couple of things that I need to complete before I can prep and paint but having an empty room is motivation to get things done quickly. Once painted I can then start on building my workbench and desk. This will then separate modelling from computing and at the moment working off a rickety folding table is not good for ergonomics and also not being able have tools etc around you as they compete with monitors and keyboards.

Although again it may not seem like there is much progress in physical modelling much of the preparation work has been carried out to make sure that the bits of the puzzle all fit together. Certainly rebooting my blog has helped me stay focused and actually making something rather than allowing procrastination to be the thief of time and hopefully very soon I’ll have the modelling space I need and want.

Until next time..

Digital dismantle

Laptop dismantle Although not strictly a modelling post it is some what linked. Things have been somewhat hectic at 15minute towers this week and also summer has arrived with a bit of a kick with temps in the high twenties and thirties yesterday which as dampened the enthusiasm to sit at my workbench.

From the picture you can see a dismantled laptop I was given in perfectly good working order as the owner had decided to upgrade to a newer much lighter one. One of their criticisms was also that it is very noisy due to the fans always being on. Looking around YouTube I came across a number of videos of people who had converted laptops into silent desktop machines and thought I’d like to have a go at that.

Why you might ask would I want to go to all that trouble to convert a perfectly good working pc into a pile of bits? Well neither do I want a loud machine and also I prefer the desktop format over the now more common place laptop form factor, in order to be able to manipulate it into a comfortable mode of operation.

So the trick will be to be able to find out how I can run it at a suitable temperature that won’t burn out the processor the minute I turn it on. It’s not at all scientific but slapping a huge lump of extruded aluminium on to the hot bits will hopefully dissipate enough heat to let me get a bit of use out of it. I just need to find a stockist locally of such an item that’s not going to cost more than buying a new one.

And now the tenuous link to modelling. I have a couple of uses for it the main one being to use it for Blender rendering as an additional processor to my rather ageing every day laptop. Although I don’t model huge scenes or models it will be good to cut the time spent waiting for the render to finish. And finally I could run a train sim on it although you may say any spare time should be real world modelling but there will be some times it is a relaxing pass time away from all other worldly distractions.

This is likely going to take me some time to complete so don’t hold your breath for too long as I have way more important projects to be working on!

Until next time..

Ding Ding, Test track round Two.

img_0222

It was in to my mind the other day when I was just finishing up on test track 1.0 that I needed a project to move on forward to. The first one had proved its purpose in not only be able to test the stock I was about to sell but to also act as a test bed for future purchases. I am not ready to start on the big project yet as I need to get a number of things in place before I can do this. So my mind turned to what would be the solution to keeping the fifteen minutes modelling going on a daily basis and then it dawned on me that another test track was the answer, well actually a diorama is closer as I wanted to use it to start testing out new techniques and ideas but in a limited form that wouldn’t take me ages to complete. I then realised it could also be used to photograph stock and cameo pics for my Swiss layout.

fullsizeoutput_719
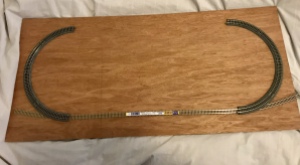
It just so happens that I have some plywood knocking around that was cut for a project long ago that I am going to repurpose. Having a ready made base would speed things up no end, however I’m planning on trying to create a lightweight board with thin strips but braced more frequently for an open board design. As it’s attached to the wall via a cleat most of the weight will be held at that point so every effort to lighten the load is good.

I had tried mocking up the oval of track on the existing board but it didn’t leave me sufficient space at the front for the scenic area that I want to create. Then thinking about alternatives I came to the conclusion that in order to allow for the scenery ideas I had I would need height from ground zero to rail level to get the elevation angles I want for taking pics. Also I have never tried this method of baseboard construction having in the past always used the flat earth approach. Once again I seem to gravitate to that same occurring ideas but at least I am reigning in my natural tendencies to expansionism and so far have kept in focus the goal of just creating something and not getting stuck in the cycle of augmentation through to analysis paralysis.

Next time I will have some real pics of my efforts of keeping to the fifteen minute mantra but for now ill leave you with a bit of a visualisation..

fullsizeoutput_717

Until next time..

Templot Open Sourcing

fullsizeoutput_726
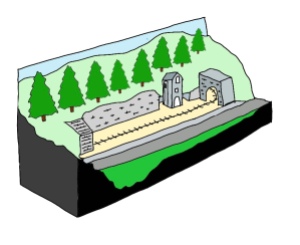
This may not be new news to some but I thought it was pertinent to bring it up now as I sit down in front of my computer with Templot open and recognise and say thank you to the developer for an amazing piece of software that not only helped me no end but also makes me happy. If your at all interested in this check out the forum for info and friendly advice.

For those of you that don’t know Templot is track planning software for the hand built track maker. It has developed over decades to a very mature product that makes extremely complex tasks just a click of a button. What it is not is a and I use the term very loosely! a train set designer, much to the mystery and annoyance of some.

I would like to salute Martin for all his efforts and look forward to Templot carrying on into the future. Right back to designing my 150mm radius points/switches for my next project which will be unveiled later next week. So modelling is being done but just some of the 3D variety.

Till next time..

All change..

It’s been a year since arriving at my current spot and now is the time to finally sort out my space. It’s the first time I have had the time and a space to be able to mould to my plans and so I have drawn up some ideas to help me decide what goes where. Now normally I’m guessing that most people have a reasonable amount of room to set up their model railway but in my case I have about 7 feet along a wall for layout and about the same for a bench, so some might think rather compact. With a bed the usable space becomes even more restrictive but then the challenge of how one goes about deciding the optimal use case is part of the fun for me.

First of all everything needs to come out and the room prepped for a coat of paint it’s been a bit of a drawn out process picking the colour as I wanted something darker not only to reduce light levels in the room but to also make a bit of a backdrop for taking photos and maybe some video in the future. As it is a north facing room light levels are lower but this works to my favour in that going for the “low key” effect a darker hue reduces the reflections. I know this is not necessarily railway modelling related but I definitely subscribe to a holistic approach and taking into account things like room environment is maybe something that is not given much though in the genesis of a railway room, it is as much about a bit of theatre as just a room to run a railway. Also I will probably only get one chance to setup as I want as the disruption of reinventing it would be too costly and time consuming.

Much of the room furniture needs to be configured to the need and as such I’m unlikely going to roll up to Ikea and return with a flat-packed solution. Due to the limited space I have measured up the workbench and desk to allow for a comfortable work height and depth and as can be seen from plan the idea of a fold up extension is to give me a good depth when modelling but can be folded away to not interfere with layout operation when I am playing trains! The idea of having to get out and put away may be onerous to some but for me it will be a help in that my natural tendencies to clutter and chaos will be curbed.

So now that I have the plan in place and have mocked up with CAD (and that’s cardboard aided modelling) I need to get on with the doing. Over the next week I’ll be making a start and will post on the progress.

Till next time

« Older posts Newer posts »