fighting procrastination fifteen minutes at a time

Category: Planning (Page 2 of 3)

New beginnings, again.

After some what of a long hiatus I have come back to 15minutemodelling with a renewed vigour and desire to take this somewhere other than the siding to nowhere. I was feeling somewhat overwhelmed by the lack of any progress with real modelling and didn’t feel that blogging about ideas and plans all the time was actually getting me anywhere. In the intervening time I thought long and hard about my direction and where I wanted to put my efforts with the little time and resources I have and settled on the one area I really wanted to model. To that end I took the rather hard decision to rid myself of all of my disparate collections of scales and gauges that I had accumulated over the years and in some cases decades from gathering dust in boxes unopened and unloved.

I am currently auctioning off groups of items in anything from Z to O scale and I didn’t realise that I had so much stuff and let’s not mention the duplicates! Once my horde has been monetised I will have the funds to get exactly what I want from baseboards to stock and electronics for this layout. It has been rather a cathartic riding myself of decades of “stuff” and centring on the one thing that I really want to model with out the distractions of multiple scales. I have always been a rubber gauger and allowed myself to get carried away with the notions and dreams of one day producing quality modelling in all these forms. As time has ticked by I came to the realisation that this was never likely to happen and that I shoud give up on this misguiding utopia. Looking around there are skilled and talented modellers that manage to juggle the different disciplines of railway but in my limited research they do tend to stick to their preferred medium. Obviously there are always exceptions to the rule but I am not one of them leading to the ephifany that I am and should be a one trick pony. This has freed up my thinking and allowed me to concentrate my efforts to actually achieve a built and finished layout. I currently have a bit of shelf space that I can utilise that I won’t get into trouble from unhelpful or inflexible landlords for drilling into walls and putting up electrics.

As I have talked about on this blog some time ago I do enjoy the challenges of layouts in smaller spaces and for me it has to be operations. I get enjoyment out of organising freight stock so for any layout there has to be some reason for movement of freight as I am really not into watching commuter trains hurry by. I love seeing old footage of a sleepy line switching out some old vans and yes I know that this may have only happened once or twice a week on the smaller branch lines and this doesn’t translate well to a model railway if run somewhat prototypically but then I am not interested in running a timetable from one summers day in 1951, but you get the picture.

This leads me on to the here and now and the reason for returning to 15minmodeller. Having de-invested myself of all of those distractions I have decided to focus all my attention on modelling, wait drum roll please, Swiss metre gauge. I have always had a fascination with it from when I was pretty young having Combe across it in some books given to me by a relative from far off lands. More specifically I will model the RhB, this is mainly in part due to Kato bringing out its range of 1:150 “Little Red One” line. This sparked off in me the realisation that I could actually achieve a layout in a limited space and that wouldn’t break the bank. With all the existing N Scale infrastructure and possibilities it just made complete sense, something could be was found to adapt if needs be rather than having to scratch build to some arbitrary esoteric scale I had picked this week. That’s not so say that this doesn’t lend its self to scratch building in fact I have thought about many things that will need to be manufactured this way.

Over the coming months I will be mapping out the plan and hoping to get started on the real thing. However the blog is not just about modelling a railway I am hoping to try out new skills and methods that I want to document into a kind of manual for myself of how to build a model railway as I have never done one for myself and as the saying goes today is a good day to start. I want to try and set myself some kind deadline for progress however small but those 15 minutes soon add up. Hopefully my next post won’t be so long overdue.

The Big Idea.

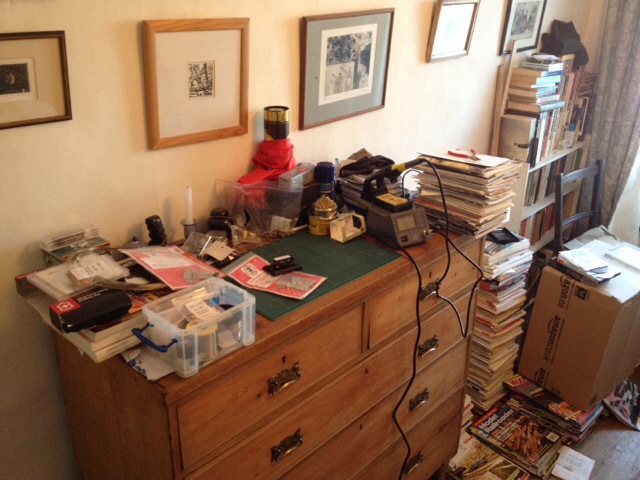
Although no physical modelling has taken place so far I haven’t been idle and in fact I see  3D modelling to be just as relevant and enjoyable as the real modelling. As I stated in my last post getting to the point where I have a layout space is still someway off and all the prep that need to go into that will take up the majority of my time at the moment. You can see by the picture below that there is an ideal wall space for the shelf layout and IMG_2311.jpegalthough I looked at using the longer wall on the other side of the room but I have deliberately settled for the shorter one as this restricts my natural expansionist tendencies, well at least for the time being. At the moment it is an easier space to convert as well as there are some pretty hefty cupboards around the rest of the room and it would make for storage difficulties due to there being not much else in the house. You may note the mattress on the floor however this will not stay there and once a suitable bed is procured will disappear to the other side of the room. I did ponder a Murphy bed but in the end too much hassle for not much gain.

So this is my blank canvas a where I get to do my modelling and where I need to map out the space requirements. From the window side to the door frame I have 6′ 6″ exactly but I am thinking about having a drop down bridge that would need six inches to allow it to be attached to the wall and braced vertically therefore giving me six feet of useable space. Then comes the basic concept; although not actually modular the structure of the railway(s) will take a similar approach in that the boards will be have a common interface with the fiddle yard or staging and will all be three feet long allowing them to be housed below the running layout in some custom draws that I thought could use the draw front as the back scene once turned round. All this is a concept at the moment and needs to be somewhat tested out.

Screen-Shot-2017-05-28-at-18.48.37.jpeg

Here is the digital mock up and with the frame and brackets I can place the layout height at pretty much anything I like. At the moment I am pondering a eye level sight line and as I don’t see multi-hour marathon operating sessions it would be like having a standing desk, and that gives good separation to the workbench and layout. Many people may say “isn’t this too much effort going into a six foot self layout” but for me playing around with the building block gives me just as much fun.

I’m off to test some things out at build a 1:12 mockup of the room. My findings in the next post.

Track plan patchwork

img_1717

Today has been spent tweeking the ‘plan’ in Templot and although this is primarily for building prototypical track plans for the more discerning modeller however I am rather abusing that premise. There are other programs available but I like doing all my noodling with it and use it to see how and where the track joins need to be place although this is now defined by the choice of base board length that I have chosen due to a number of choices that include size, weight and portability. The plan does fit into the space pretty well and I haven’t cropped all the pages so that I am not getting a completely accurate picture but at the moment I am just checking clearances both for track and stock.

Once I have the final plan I will only print out the crossover as this is the only part of the layout that I will be building and its at that point I will tighten the placing of ties and check rails etc. The rest of the track will be laid out once glued down but it will only act as an aid to general position. I will be able to work on the crossover once I have the supplies which I will get from the Warley Show next month.

One of the changes required is the straightening of the road coming out of the crossover and given that that road is much longer than I had expected now seeing it in the flesh so to speak, I may add another road, a team track nearest to us. There are also a few tweeks elsewhere but these are just minor. Not shown here is a template for a six axle loco based on a SD40, probably the largest loco to do any switching on the layout which I am using to  highlight the pinch points. I am not one for the huge AC44’s or SD90’s and much more a fan of the smaller Geeps and if and possibly when it is attached to anything else then the big horses will just be passing trough.

I just need to get on now by finishing the boards and legs off and as usual life is interfering with me playing but I’m not sitting around idly and count the time spent on the computer in the evenings as modelling time, it’s just a digital version.

Till next time..

First branches

tomusaplan_v3

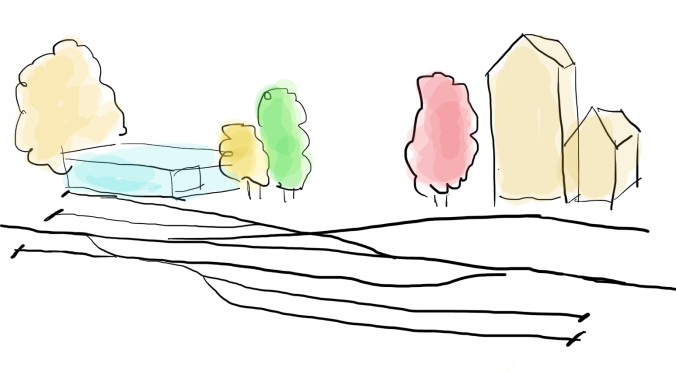
Following on from yesterday I post my interpretation of the track plan I have been noodling around on back of envelopes over the last few weeks and gives me an idea of the setting for the layout. As I sit here with Autumn settling in around me, the trees are changing colour but not in the way they do in the location that I am trying to capture but I have been noting and grabbing some pics as a sort of reference, yes I know I don’t need to leave the comfort of my armchair but it helps to have reference even if only for future projects. So I have been concentrating on looking for locations via the wonders of online mapping services that will conjure up a shoreline with small towns and small trains and by that I mean not half mile long ones. I have plenty of saved images of proto short trains saved from image archives my favourite being nerailorg

With the width of the boards being eighteen inches I have some space to have a life away from the tracks and although the buildings in HO are going to be fairly big I have to see what fits in that space even if I have it as low relief but the trees are going to be an important feature.

The basic plan is for two industries yet to be decided, and then two exchange or interchange? tracks nearest to us where freight is swopped to another railroad yet to be decided also, yes its all pretty much up in the air at the moment as I would like to base the location on somewhere semi prototypical although I am not adverse to completely free styling it. And finally a possible loco servicing point on the nearest track at the far left. Maybe I should have jotted this on the sketch 🙂

The plan is to use Peco code 83 flexi and a mixture of #6’s for the main and #5’s for the yards and the crossover for the industries which will be hand built on PCB ties. For the moment the switches will all be hand operated and I am considering either complete hand operated or under board rodding with operation from both sides but not sure about the knobs sticking out but will wait to see when I get there although thinking about it it would save leaning over scenery etc.

For the moment that’s all and tomorrow I will have the track plan finalised and printed out for when the boards are complete and I have the board legs to stand it all on, although the bulk of modelling is probably going to take place on the kitchen table board by board. Till then..

Rrrrr rr restart!

Ok so I can come off the naughty step, take the dunces hat off and take the walk of shame back to the land of mojo. I really hadn’t realised it had been so long since my last post and that this blog has been running since 2013 with virtually no progress concrete or other wise modelling going on. However that is all about to change he said and in this one post I am going to re-ignite the flames of progress and get back to that fifteen minutes (at least) a day as proclaimed in the title of this blog.

When I set out and started my blog having seen many others extolling the virtues of a small chunk of time a day set aside for modelling or hobby time I decided that this would get me going and banish the analysis paralysis that had plagued me. As a very settled some might say stuck armchair modeller I got my enjoyment out of the endless planning and noodling and virtual modelling allowed via computer driven simulator sessions. I have in the past started many projects that with good intentions never quite manage to get beyond the embryonic stage, don’t get me wrong I have modelled for others completing the task(s) adequately but when it comes to my own work I seem to have a mental block. However with all that said I/we are here for a fresh start and a new start it is as I have taken up an idea that kind of popped in there whilst I was least expecting it.

What is that idea I hear you ask. Well the genesis for it started back last year well I was reading this thread and had a kind of “Uhh-huh” moment and then again it was cemented when I was visiting a friend and the discussion got to his US layout. I had remembered that  hidden in the railway boxes were some HO Kato Geeps and mentioned to my friend that this might be an interesting idea to design a HO shelf layout for him based on an L to start with. Coming away I didn’t give it much thought and it wasn’t till I travelled down to see him again with said locos that the itch that needed scratching returned. He was taken with  those smooth running locos and the leap to HO was made. Then time went by as we pasted ideas and plans backwards and forwards, again the planning stage engaging me with the creative juices flowing on what we could achieve. But this was on someone else’s layout not my own. Through various events over the last few years organising my modelling has been somewhat difficult and this has been the main reason why things have not progress in any kind of fashion however that is about to change. It was a kind of light bulb moment for me when I realised that the best way forward would be a modular layout that could be moved at short notice if needs be and that could be adaptable to the space it lives in. I’m not sure if it will ever leave here but having read about modular meet ups it does sound fun, but that is someway off in the distance.

So to a bit of background for this latest attempt. HO; check, US; check, New England; check, Fall colours; check. Yes I know nothing original here and the majority of UK modellers will either model NE or Desert railroads but for me it is the greenness of New England that resonates with my British sensibilities and I also want to sneak a covered bridge in at some point. I have deliberately kept the modules small and at 30″ x 18″ they are more manageable and will fit into our little Ford easily. I have been also thinking about the scenery and more to come on that as and when I get that far.

So till next time..

img_1712

Over the hills

Due to the on going man cold I have shied away from getting tools both hand and power tools out today as head colds and tools don’t make for a good recipe. So in order to keep the flow going and to keep the mojo moving on I set out to find my Canon PIXMA IP4000 printer that has been through a number of moves and stayed in storage for a while. Not being confident that it would a) start up and b) print I was pleasantly surprised to find it did both, in a fashion. It took 3 power ups and once on advised me that virtually all the ink tanks were empty or faulty so no surprise there and was surprised that it even got that far I was thinking that I would have to buy a new printer completely. I am as every waiting so waiting for some ink will be no biggy and looking forward to doing some structure modelling having seen the efforts I made over 30 years ago..

I have been enthralled with pics mainly on Facebook from tram systems across Europe and the ones I am interested in are the Swiss metre gauge but I have been admiring the heritage systems. But it has lead to thoughts of Swiss Alps mountain village halt and buildings close together. In fact I think I can transpose this scenario into many different locations and scales. But thats of the future!!

So if this is working you can see some of my inspirations

Gingeryitius

Having for a very long time wanted a lathe, a number of factors over the years have construed to thwart me in this endeavour. The first being time and the latter being money. Now in a position where time is abundant but money is scarce I find myself going back to the idea of self build, or in modern par lance open sourcing.

A couple of years ago I came across mentions of the Gingery Lathe (GL) this then followed research and finding out that there was a set of books to go from nothing to a full workshop of machine tools. This sounded amazing and just what was needed. However at the time my work was all consuming and left little time for backyard casting antics let alone machining and making that level of mess in a second floor flat. So ideas of having my own lathe were put on the back burner until a time came when I would be able to make mess and have some space and time to do that.

Going back through my browser links the other day I came across the GL links which whetted my appetite again to have a go at backyard casting a machine tool making. With all my other Youtubing around table saws and the like I came across another amazing find and just what I was looking for!

Having no experience what’s so ever in metal work apart from the very limited sojourn at school I am also interested to learn these skills and some others to make for a fully rounded home shop bodger (my term) which will include a bit of welding too. This will hopefully start to pan out over the next year as I know these things take time and things have to be learnt. Even now I am looking for evening classes for home engineering and welding.

From small planks, big layouts grow.

Although I completed this yesterday (almost) I thought it would be wise to have a bit of a test bed to trial a number of techniques and products I have never used before that being mainly the Kato Unitrack. I have kept it deliberately simple and at most will have two turnouts/switches on it. I thought that I could use it as a DCC test track and that will fit down the back on a small ledge behind the line shown on the right hand side of the board. I am thinking about adding my SprogII to the underside but will see how I go with this, I may just stick to the Kato controller that came with the GlaicerOnTour set.. Having Bachrus rolling roads that I can set up on it for running locos in is going to be useful and it delays the need for installing Decoders into the locos. On with point Digitrax do a drop in one but other wired ones can be installed just it is a bit harder due to space constraints.

I will be trying out joining Peco concrete flex track to the Unitrack and may try a bit of hand lay just as an experiment. The original discussion see-sawed around wether it would all be hand laid or all Unitrack then a mixture and then back and forth but the upshot of it was that the ends have to be Kato and anything in the middle is fair game as long as it allows the Kato and any future stock to run over it.

So todays 15 minutes are to finish the backscenes and create the fiddle yard. then its off to the model shop to find some ballast material. Well actually that will be tomorrow as nothing open today, being Sunday!

A test bed for Swiss GEX layout ideas

A test bed for Swiss GEX layout ideas

Switching tracks

Workshop

Workshop space

After yet another extended silence and inactivity things have started to move on again! However this time in a slightly different direction although not completely on tangent. I have been struggling recently with where my modelling was going, the foam core failure and all the life events and upheavals that have/are hopefully somewhat sorting them selves out now. As stated before I don’t have a huge amount of space to “play” with and it is also a semi permanent state that has to be able to transmute at a moments notice. Couple this with a chronic inertia, this is not a particularly good receipt for success. So changing direction  has allowed me to think differently about my current modelling activities and efforts and although I want to complete my 2mmFS plans I have come to the conclusion that to do it properly I need a static place and this is some way off still. Thats not to say that it can’t be moved towards as all sorts of items can be built in preparation. But for the time being I have put these plans on hold.

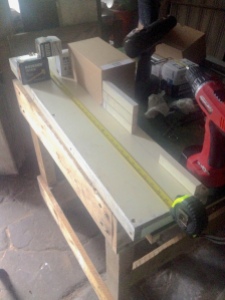
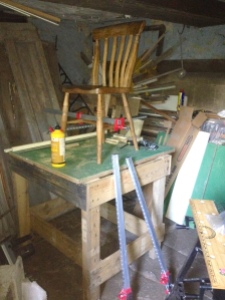
The first part of the current story is getting some space to smack bits of wood around and although not ideal is a place to make a mess. Having taken quite some time to clear and prepare as you can see I have a bench which is not only sturdy but flat too. I am pretty amazed at the quality of the work and somehow fell it was put together by someone else. I am however really please with it and has made so much easier. I just need some finishing touches such as a draw for vital things like pencils, squares and planes. I am also amassing a collection of clamps and as someone once said you can never have to many of them. Now that I have my workshop set up I am in a better position to successfully build baseboards that are not my usual Heath Robinson affairs.

Moving on to the second part, after a meeting with a fellow modelrailradio listener AndyD at the York show and subsequent illicit viewings of a Kato boxed Glacier Express set in the car park my fate was sealed. These are lovely things and although the purists will be complaining it is not to scale, it is to the usual Kato high standards, but I will put a separate post up about this. Once I had sold myself on the idea, though this didn’t take much, thoughts bubbled away for a couple of months. Then caution was thrown to the wind and I purchased on Amazon a standard GEX set. Shortly after realising that I wouldn’t be happy unless I had the full set with buffet car and first carriages I added that order history.

Then the confession. I don’t think Andy was too surprised when I announced that I had purchased said GEX set and then the conversations started about what I was going to build to run it on. Space was measured out and tweaked around to get the maximum coverage, then a scaling back followed by another land grab. Eventually an L shaped plan was settled on and then permission needed to be sort to go ahead with planned project. Unfortunately or fortunately permission to proceed was denied based on it took up too much space and wouldn’t be easy to move quickly. At the time I didn’t realise that this was true and that actually it had allowed me to think differently about the solution. So after quite some discussion with Andy up steps the modular idea. Having looked at the standard N modular frameworks such as Freemo and N-Trak, I didn’t feel they fitted my needs and so decided to come up with an idea of my own, also to follow in a further post. With the ideas batted backwards and forwards between us there came a much better solution to my needs and had the add benefits of others in the future being able to add to it. So at the  moment I have around 8ft long shelfy type modular layout with station in the middle and two helixes at each end so pretty much a roundy roundy..


So once my table sorted then I can start cutting the plywood needed there are many things between here and there. But for now I am focused and excited about the “plan”. In the meantime I have knocked up a test bed for things like track ballasting, buildings and catenary etc. But the aim is not to get carried away or become to bothered about proto-typicalness but I am hoping that Kato extend the range and bring out some freight wagons. Only time will tell, however there is always 3D Printing…….


Temporary Tinkerings

With this new found surge of mojo inducing activity and following on from last nights post I have set up a temporary little work bench that I can leave set up and not have to remove myself from the kitchen table every time I want to do some modelling. Although not shown here I came across a number of points/switches in the boxes that I had completely forgotten I had, but that’s for a future post. But back to the workbench, I also found a small vice cheap and cheerful, well so cheap that the jaws are almost at 45degs so is it worth trying remedial work on it or to bin and look for a new quality item. Well in these days of austerity it may have to be the former.

Also I think a little tray for banging and bashing might be a good idea and also a good mounting point for the vice. In fact I would quite like to build a tool box for my modelling tools and whilst going through my back catalogue of Railway Modellers there are some good articles to inspiration and ideas from. I fact I would love to set some time aside to sit back in the afternoon with a cuppa in a sunny corner and refresh and relive those happy teenage years, so long ago 🙂

20140216-103808.jpg

Second up is a pic of an LNER horse box that I will be using on my 2mmFS layout of Leyburn when I start to build it though I think this may be the last big project due to the rate of knots I am currently working at. This was used to take racehorses from Middleham where the racing community had grown and to this day thrives, to Leyburn for transport on to Ripon, York and all points to Newmarket. An Oxford Diecast model that I hadn’t realised I had brought and was thinking that this might be an ideal first 3D printing project but then out of Aladdin’s cave this came chugging and smoking, well at least in my mind. I think that a dusting of Tamiya powders will offset the glossiness. One thing I do think detracts a bit from the model are the wheels. But a small matter to paint some detail in and also dirty up. I don’t think that I will be going to the effort of making it more finescale.

And lastly is a 2mmFS wagon kit brought at an exhibition somewhere. I think I must have about 10 of these as I pretty much brought one every time I saw the 2mil stand at shows. But this is an easy to start and finish project and if all completed will give me a nice little rack of mineral wagons.

As part of the tool shop I have been thinking about getting an airbrush and from all I have read and heard that iawata is the way to go, but this is quite a big ticket item with all the necessary compressor etc but again that’s further down the road.

20140216-112555.jpg

« Older posts Newer posts »