fighting procrastination fifteen minutes at a time

Tag: N Scale (Page 2 of 2)

Test track build #3

With having a couple of days off with other stuff going on today saw the completion of the four track panels bar a bit of fettling to get the rails to match up at the joins and the inner 6.5mm track fixing down I made a start on that too. I had considered using some road bed but felt it was a waste of time as this is only going to be used occasionally.

First rail laid down for Z tester. I didn’t bother with gauges and elected to use a cheap set of digital calipers to measure the gap holding rail in place by the age old method of fingers remembering to remove them just before it got to burning point. Tomorrow I’ll have all inner rails added and plan to glue down the track.

Till next time..

Test track build #2

Ok it took me slightly longer than 15 mins but keeping the momentum going. I have moved on from the first iteration and now building the ‘proper’ track in sections to make it manageable and also allow for some expansion. I’m building it this way as I found that from the previous straight piece it was easier to build the outer rails and then cut the isolation gap before attaching the inner rail for Z track.

Once I was happy with the alignment, well almost happy as it’s a little bit of a squeeze to get it to align I went and washed off with washing up liquid and an old toothbrush to get rid of any flux residue. Just need to make the last two panels of track before I can glue down and electrify.

Ironing out the rails

Arrgghhh, I started out last night writing this post almost getting to end when virtually all my hard thought prose were wiped off the face of the planet. When will I ever learn as this is not the first time I have been stung this way and thinking that writing the post in the WordPress app on my mobile device is a good idea. So from now on these posts will be hand crafted away from the web and then pasted in at the last moment. In this day and age I’m surprised that this still can happen and that web coders can’t have a back button on the WordPress app but that’s going way off topic.

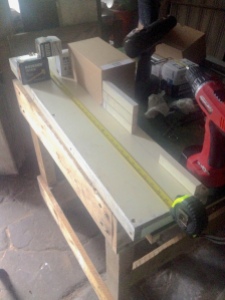
Ok, so finally something to show for effort and not just a blathering post about thoughts and plans, and what magazines I have been buying. As the observant of you will notice yes this is a bit of dual gauge track, but don’t look too closely at the soldering! It’s been some time since I last picked up the iron in anger and had to go through all the faff of digging out all the required bits and pieces such as solder and flux etc and then remember what temps I needed to set it at. That being said I have finally managed to light a bonfire under the mojo and get cracking with project 1 here at 15minutemodeller headquarters. Also in this pic is the baseboard knocked up to start this project off. For once no lengthy planning sessions were carried out in order to ascertain the optimum design, no 3D mockups to waste some more time creating cutting lists that would have made the builders of the Cutty Sark blush. No this was literally two lumps of batten chopped up and a chunk of ply grabbed from the wood pile and screwed and glued together in a blink of an eye. Unheard of? Yes! It’s certainly not beautiful but certainly functional if just a bit on the heavy side but then again I wasn’t going for experimental lightweight forms.

Now the reason for this test track is two fold; firstly to act as a 9 millimetre-ish and I say this as I plan to be able to use it for both my Kato stuff and also for some future 2mmFS plans as they can share the same gauge with no problems it’s only when switches are introduced that it becomes a bit sketchy. Yes I Know I said I was forsaking all other distractions but the reality is that I know I am never going to be able to limit myself to just one thing and also my plans for 15minutemodeller have changed to allow for my inveterate rubber gauge tendencies and hopefully more will be revealed over time.

Then the reason for the second and narrower gauge is to accommodate the testing my collection of both American and Swiss Z scale that I have now finally decided to liquidate. In order to put the locos on a well know auction site I need to check to see if there running ok as it is an not insignificant amount of time since I last took them out of there boxes and ran them. Plonking and extra rail on the test track to facilitate this is no real extra effort and who knows whether it might be of use in the future. Just after building the board rummaging through the boxes I uncovered the rolling road I brought many moons ago, in fact not just one set but two, jeez that was a time of way too much money and little sense although in this case it paid off as going forward I will be using these to run locos in, but then there is something relaxing about watching a train trundling around a track. We’ll see how long the test track survives after the locos it’s built for have left the building.

Just as a side note one can build hand laidback with nothing but a set of callipers either manual of digital and you don’t need fancy brass gauges in order to build something operational, points/switches may be a little more challenging but not impossible. So to get the very rusty soldering muscles going I built a very small section of straight dual gauge from a recycled point I made for another project years ago, to test out the workflow needed to build the full circle and I’m glad I did it as it point out some failings in my thinking about how I was going to put things together.

It’s great to smell the aroma of 60/40 again and now that I have the platform to build on I just need to get some metal down.

Until next time..

Kato Swiss RhB – 2017

Something I am pretty excited about is the forthcoming Kato additions to their 2017 Swiss Meter Gauge RhB range of stock. It would seem that they are expanding the range due to popular demand and the novelty value that everyone thought was going to be the case when Kato first started producing this line has been proceeded with some very popular stock choices bearing in mind this is really aimed at the Japanese tourist market and not the railway modeller. It would seem although with the addition of the 2017 items I thing the pendulum is swinging the other way and now modellers are hungry for more. Kato must have seen the surge in orders, I am of course basing this on pure speculation as I have no figures to back it up, as a green light to grow the range beyond their coasts.

Like most of ‘us’ European modellers I can’t wait till they bring out some wagons, and the speculation of what that might be is fun. I would guess it would probably be a cement wagon or maybe a container bogie wagon given the ubiquity of them. But thats way off in the future and for the moment I would have to get filling the penny jar for the first wave of coaches and a Ge4/4III or two.

So here is a bit of a peek at whats coming.

and a link to Gaugemaster‘s site in the UK though I have brought from Japan before but I need to work out the costings now due to currency fluctuations, but I can also recommend TrainTrax and have had very good service from them. Anyway exciting times.

From small planks, big layouts grow.

Although I completed this yesterday (almost) I thought it would be wise to have a bit of a test bed to trial a number of techniques and products I have never used before that being mainly the Kato Unitrack. I have kept it deliberately simple and at most will have two turnouts/switches on it. I thought that I could use it as a DCC test track and that will fit down the back on a small ledge behind the line shown on the right hand side of the board. I am thinking about adding my SprogII to the underside but will see how I go with this, I may just stick to the Kato controller that came with the GlaicerOnTour set.. Having Bachrus rolling roads that I can set up on it for running locos in is going to be useful and it delays the need for installing Decoders into the locos. On with point Digitrax do a drop in one but other wired ones can be installed just it is a bit harder due to space constraints.

I will be trying out joining Peco concrete flex track to the Unitrack and may try a bit of hand lay just as an experiment. The original discussion see-sawed around wether it would all be hand laid or all Unitrack then a mixture and then back and forth but the upshot of it was that the ends have to be Kato and anything in the middle is fair game as long as it allows the Kato and any future stock to run over it.

So todays 15 minutes are to finish the backscenes and create the fiddle yard. then its off to the model shop to find some ballast material. Well actually that will be tomorrow as nothing open today, being Sunday!

A test bed for Swiss GEX layout ideas

A test bed for Swiss GEX layout ideas

Stock take 2

Ok so next up box of mainly UK N scale and some US N and some odd and sods of 009, some kits I completely forgot I had and bunch of Lenz decoders. The real surprises were the 2mmFS Peco converted wagons, some Z scale track gauges I made on a makeshift power drill lathe many years ago, Dapol Class 86 and the Dapol Grand Central HST pack with couple of coaches.. all new to me. Some of this will go as I will never model ECML and the 009 will probably go too.

Ok onwards and upwards as they say.

Stockbox2

P4.2: Mini Challenge

jigsnstuff

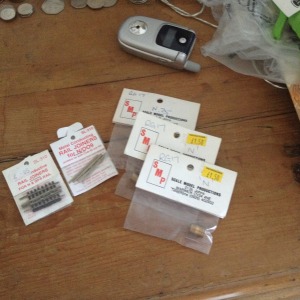
Time goes by and I am still not able to do anything physical with the challenge at the moment but I have been able to acquire some ‘things’ for the project as you can see from the picture below. I managed to get all of this for under five quid from a very generous chap who must of had these in his gloat box for quite some time, the going rate for the gauges are now £5 each and as you can see the price tag of £1.50 my guess is that it points to them being c1980’s.

As you maybe able to see from the photo on  one of the jigs it denotes that these are for code 75 rail, now this being an cheap n cheerful project I have to think about how it is going to interface with the Peco track that I already have. Also sourcing Code 75 cheaply is going to be a bit of a challengeI think. I also need to find the PCB ties(sleepers) to build the turnouts and although I know you can get a sheet reasonably cheaply it then needs to be cut to dimension and this is where it then gets tough. So I will now look at other avenues. I know the 2mmSA do them but they will be over sized as the track gauge is 9.42. Would I want to individually cut each tie or leave them as is and try and cover up the additional length. Then theres always Fast-tracks but this is not a cheap option. I have been looking at and thinking about getting one of these tools but as most of my track planning is done on curves it would not seem to be suitable for this method.

Although I have manage to source some foamboard I am trying to work out whether this will be suitable for the project. I would like to build the picture frame effect and am not sure if a) I have enough FB b) it will be strong enough to support the weight of the proscenium effect. However the ease of construction and the amount of bracing can over come this given the right amount of materials to do it. The other option would be to use ply. I do have some 12mm ply, this is not light, from an old table tennis table but am not sure about the the structural integrity of it as it has been leant up against a wall for 20 odd years. Also the weight may be an issue. Cutting along long straight lines has never been one of my strong points and so I would have to beg, borrow or steal, (well maybe not steal 😉 ) a power tool of some sorts to assist me in this task.

So now the hard part I just have to come up with a track plan that is believable. So its off to scour Google Earth for an appropriate location in Vermont, New England. I want to keep it simple but have enough operational interest to keep ones attention and given that this will be a micro layout that maybe a bit of a stretch as generally the spaces needed for NA locations is greater than that of UK prototypes. I like the idea of switching cars out using a card system and that ties in with project three but don’t want to make it too complicated as to spoil the fun! Having now recovered my goods and chattels from storage amongst a whole bunch of things I had forgotten about I have uncovered some hefty book tokens and couple of iPhone programming books. Maybe an early Christmas present to myself of some Python books or maybe the new Gordon Gravett; Wild Swan scenery books will take precedences so I may get side tracked with those possibilities…

P4.1: Mini Challenge

Image

Whilst rummaging around at the top of the house I came across these items and thought ahh something to challenge me until I get my modelling kit back from storage. So this looks like the start of Project 4.

The location is New England, the period; current, and the scale obviously N. The Peco track if code 55 and I have no switches which makes it rather limited. So in the spirit of days gone by I am going to see if I can build some from PCB and some home made gauges using templates printed out from Templot. My idea is of a shortline with a couple of industries along it that are currently serviced by VRS. Maybe in the future they will get there own leased loco and have a nice respray. I particularly like the covered bridges of NE so will be looking to incorporate one of these and seeing as most of Vermont’s industries are based around timber there will probably be a sawmill.

The beginnings are in the baseboard and think I am going to keep it small 4-5 feet long by 12 inches wide, probably. I have my eye on an old home made table tennis table thats made out of 9mm ply. Once I have got the go ahead to dismantle I then have to work out how to cut and fear I may have to use hand saws which when cutting sheet materials is not a good mix with me as I can cut as straight as a bendy inner tube! Am going to have to see what power tools I can find in the house!

Wombling here we come.

Newer posts »