fighting procrastination fifteen minutes at a time

Author: 15minutemodeller (Page 8 of 10)

Revisionist

Having from the beginning thought that the plank was no more than a plank and a exercise in ballasting some Kato track it has moved on from there and now after some discussion has the idea for a turntable as a holding storage area. At first I seemed as though a cassette system would be ok then I moved onto a sector plate and finally ended up with a turntable. This is somewhat ballooning for the original idea but I guess it can’t harm right? Measuring the Kato Unitrack two 413mm radii curves and a straight sandwiched between them takes up pretty much dead on 10″ and this is pretty much how much space I have on the plank. When not in use the turntable can be stored elsewhere as it is easily removed and it will aligned by baseboard jointing dowels.

So then the fact of how is this integrated into current track bed, the only option is to raise the whole road base up by 9mm so that the trains can transfer from yard to station. So out with the circular saw and cut some more chunks of ply not too difficult but it just means the back scene height is lowered by 9mm. Having just had plumbers in, who kindly left behind a bunch of stuff amongst which was some 9mm ply I have enough off cut to easily create raised trackbed and turntable. When I get back from vaunt down South I will attempt to get this completed before heading off to another weekend of fun!

Turntable

New improved fiddle yard option

ArmchairTV modelling

Just a quick post about the new (to me) Trainmasters TV.  I have just been able to join up and getting a discount for subscribing to MRH made it even more appealing. Although the content is predominately North American the modelling techniques are pretty universal. I am just working through back drop painting at the moment and have picked up some really useful tips. Although at the moment I am doing this digitally I plan to get some brushes and acrylic paints to have a go at a Alpine backdrop.. don’t hold your breath though as this is going to be a lot harder than I think and having seen the like of Troels Kirk’s work I won’t be happy till its right.

TMTV is not only about modelling and there are some interesting in sites into the proto railroads that normally I wouldn’t find that interesting. I think that the possibilities are endless when it comes to the content they can serve up and am looking forward to how they progress with this. Although you can find so much on Youtube  the content here has a much more polished feel to it and as its all in HD you get the full effect..

So for the price of a sandwich a month, you can get some really good quality content to sit back and watch and learn.

Oh and then theres Lionel 🙂

Imageering

imageering

Imagineering the what ifs

This afternoon was spent adding a bit more to the test plank but not adding the tunnel back scene as not sure where the tunnel is actually going to go at the moment. It has evolved a bit as I am now going to have a traverser that will swing from front to back so that the DCC programming track can be used as a storage road. Although the primary goal for this test plank is to test out scenery task like ballasting and building structures etc I have hedged my bets and gone with something I can switch ‘something’ backwards and forwards on. I have gone with this plan as it gives me a bit more space in the station area and as you can see there is enough room for loco and two. It is envisaged that train pulls in and stops second loco removes coaches and disappears. first loco disappears. Second loco returns and waits then pulls away.

If in the future some wagons come out then I will use it to shut them around a bit. This will however not going to take the place of the main modular layout and is really there to test out locos, run them in and maybe a photo back drop. But it gets the juices flowing for planning on the “big” layout. In fact this is the first time in a long time that I can see it all before I have built it which is promising. And the progress shown is more than in the last decade. But a start is a start!

Tomorrow will be spent working out the tunnel location, the transfer table and the electric feed locations. I then need to work out what track I need and this will be really simple as it will mainly be straights and maybe one or two curves but another #4 point is needed so will hopefully be able to pick one of those up. Unfortunately there are no modelshops in the local area anymore and so it is quite a trek to be able to pick up just the basics so most of my model related shopping is done online. Of course shows are an option but again getting to them can be expensive and time consuming, but I digress. So far I have kept up a 3 day streak of modelling, lets see how long it can carry on!

From small planks, big layouts grow.

Although I completed this yesterday (almost) I thought it would be wise to have a bit of a test bed to trial a number of techniques and products I have never used before that being mainly the Kato Unitrack. I have kept it deliberately simple and at most will have two turnouts/switches on it. I thought that I could use it as a DCC test track and that will fit down the back on a small ledge behind the line shown on the right hand side of the board. I am thinking about adding my SprogII to the underside but will see how I go with this, I may just stick to the Kato controller that came with the GlaicerOnTour set.. Having Bachrus rolling roads that I can set up on it for running locos in is going to be useful and it delays the need for installing Decoders into the locos. On with point Digitrax do a drop in one but other wired ones can be installed just it is a bit harder due to space constraints.

I will be trying out joining Peco concrete flex track to the Unitrack and may try a bit of hand lay just as an experiment. The original discussion see-sawed around wether it would all be hand laid or all Unitrack then a mixture and then back and forth but the upshot of it was that the ends have to be Kato and anything in the middle is fair game as long as it allows the Kato and any future stock to run over it.

So todays 15 minutes are to finish the backscenes and create the fiddle yard. then its off to the model shop to find some ballast material. Well actually that will be tomorrow as nothing open today, being Sunday!

A test bed for Swiss GEX layout ideas

A test bed for Swiss GEX layout ideas

Switching tracks

Workshop

Workshop space

After yet another extended silence and inactivity things have started to move on again! However this time in a slightly different direction although not completely on tangent. I have been struggling recently with where my modelling was going, the foam core failure and all the life events and upheavals that have/are hopefully somewhat sorting them selves out now. As stated before I don’t have a huge amount of space to “play” with and it is also a semi permanent state that has to be able to transmute at a moments notice. Couple this with a chronic inertia, this is not a particularly good receipt for success. So changing direction  has allowed me to think differently about my current modelling activities and efforts and although I want to complete my 2mmFS plans I have come to the conclusion that to do it properly I need a static place and this is some way off still. Thats not to say that it can’t be moved towards as all sorts of items can be built in preparation. But for the time being I have put these plans on hold.

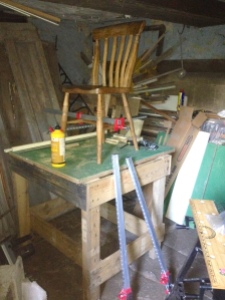
The first part of the current story is getting some space to smack bits of wood around and although not ideal is a place to make a mess. Having taken quite some time to clear and prepare as you can see I have a bench which is not only sturdy but flat too. I am pretty amazed at the quality of the work and somehow fell it was put together by someone else. I am however really please with it and has made so much easier. I just need some finishing touches such as a draw for vital things like pencils, squares and planes. I am also amassing a collection of clamps and as someone once said you can never have to many of them. Now that I have my workshop set up I am in a better position to successfully build baseboards that are not my usual Heath Robinson affairs.

Moving on to the second part, after a meeting with a fellow modelrailradio listener AndyD at the York show and subsequent illicit viewings of a Kato boxed Glacier Express set in the car park my fate was sealed. These are lovely things and although the purists will be complaining it is not to scale, it is to the usual Kato high standards, but I will put a separate post up about this. Once I had sold myself on the idea, though this didn’t take much, thoughts bubbled away for a couple of months. Then caution was thrown to the wind and I purchased on Amazon a standard GEX set. Shortly after realising that I wouldn’t be happy unless I had the full set with buffet car and first carriages I added that order history.

Then the confession. I don’t think Andy was too surprised when I announced that I had purchased said GEX set and then the conversations started about what I was going to build to run it on. Space was measured out and tweaked around to get the maximum coverage, then a scaling back followed by another land grab. Eventually an L shaped plan was settled on and then permission needed to be sort to go ahead with planned project. Unfortunately or fortunately permission to proceed was denied based on it took up too much space and wouldn’t be easy to move quickly. At the time I didn’t realise that this was true and that actually it had allowed me to think differently about the solution. So after quite some discussion with Andy up steps the modular idea. Having looked at the standard N modular frameworks such as Freemo and N-Trak, I didn’t feel they fitted my needs and so decided to come up with an idea of my own, also to follow in a further post. With the ideas batted backwards and forwards between us there came a much better solution to my needs and had the add benefits of others in the future being able to add to it. So at the  moment I have around 8ft long shelfy type modular layout with station in the middle and two helixes at each end so pretty much a roundy roundy..


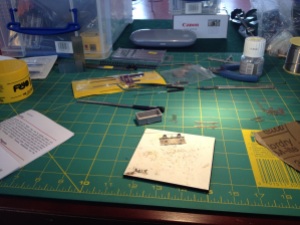
So once my table sorted then I can start cutting the plywood needed there are many things between here and there. But for now I am focused and excited about the “plan”. In the meantime I have knocked up a test bed for things like track ballasting, buildings and catenary etc. But the aim is not to get carried away or become to bothered about proto-typicalness but I am hoping that Kato extend the range and bring out some freight wagons. Only time will tell, however there is always 3D Printing…….


Foaming ‘ell

Well just a quick post before I go to bed as a full and fun packed day ahead at York Show very much a favourite of mine and so far has never disappointed. But back to tonights fifteen minute effort. As you can see from the picture be below I have managed to overcome the inertia and start something constructive. I came to the conclusion that it is better to fail than never try at all and so I got the craft knife and hot glue gun out and made some mess. The beauty of foam board is that it docent make mess and is very quick to build something. I had a basic idea and just went with that, very rudimentary measurements were made and the cutting was done on a professional mount cutter that my dad use to use which in theory should have made it an accurately produced cutting list however they hadn’t reckoned on me using it! However I thought that practice makes perfect and no task can be completed with perfection on the first run however much I think it can. I do suffer somewhat from perfectionist tendencies and have to wrestle with this pretty much every time I pick up a tool. But I am learning to overcome these thoughts and in the words of Nike ‘just do it.

Some some quick details it is 1m long and about 300m wide and the facia will house the light with the electronic mounted at the back of the underside for easy access.at the moment there needs to be a lot more bracing to make more robust and hopefully take some of the kinks out that I have found in cutting the board. I have to say that it was wombled from some friends that had it sitting around. Having looked at the completed work this evening I am wondering if the warp at the eastern end, as I am calling it, will be suitable for laying the tracks. I am going to use a mixture of Easitrac and hand lay and if it is a problem I will have to raise the road bed to be able to level it across the whole board. So we will see.

Even if this a failure in the long run it will certainly help get the momentum going and what doesn’t kill me makes me stronger 😉

Anyway more to follow in next couple of days as I have a hectic social calendar and a couple of trips away. Stay tuned..

Foamboard Test Layout

Day 2 of Foamboard build

Back on the Wagon

After a rather too long a hiatus in modelling terms due to life getting in the way I have managed to get back to the workspace. Yesterday I attended the NEAG meet that was primarily for getting people building and most of us built a 2mmFS Mineral Wagon kit and had the challenge to complete it by the end of the day. I didn’t get off to a good start by forgetting my soldering iron (I have at least 5 with the temp controlled one I was going to take got out ready the night before, and a craft knife) Thankfully one was provided for me and I cadged off my fellow AG member for the knife. It also realised/remembered that there are all sorts of little jigs and things like Blutac and hair clips. I have also been thinking about toolbox build and adapting it to my needs. I therefore haven’t moved ahead with this yet but I have make contact with local timber merchants who will supply and cut good quality Birch Ply along with carcassing timber for another project.

Unfortunately I didn’t manage to get that far but I certainly managed to get a good way on with it. The boost it provided has got be back to getting on with my modelling and certainly will keep momentum going as I got another kit to bring home with me to start as soon as I have finished the first one. In fact I have a rake of about 15-20 to build of these so once I have completed one to my satisfaction I will start batch processing.

This leads me on to what to run these on. Well I am going to try to build a foam board micro, a kind of inglenook keeping it simple!! but building some things that can be transferred to the ‘big’ layout. But less talking more doing! 🙂

Wagon kit building

Wagon kit building starts


Before lunch

Before lunch


Somewhat nearly finished

End of the day


Building blocks

Today I have been messing around with my Rasberry Pi and a box Lego that goes back to when we were kids. It has been kept in a  trunk for the the last oh longer than I care to remember and successive generations of kids both family and friends have played with it. It is lasting testament to Ole Kirk Christiansen that his bricks are still being used today by young and old. Even now, usually at Christmas when we all get together the Lego box comes out and the adults build and play with the kids with just as much fun. Spaceships, cars, dolls houses, farm yards and trains are all conjured out of the imagination and brought to life by those little plastic bricks.  But I digress..

So the plan is to build a case that houses both the Pi and my SROG II. I Have been messing around with both I am also going to look at unifying the power supplies for both if I can making it more compact and portable for future needs. As the SPROG can only really run a small N or Z scale layout I am not planning on running an empire from it but hope to use it for layouts that I may exhibit in the future. I have uploaded JMRI to Pi but have not had time to test this out yet although there are plenty of examples on the net to reference its use on the microPC. One factor that needs to be address is the screen. Here I have had a number of thoughts, one of which would be to get a cheap tablet and remotely control the Pi. I guess testing would prove the suitability of this method. Or a small touch screen could be mounted onto the case but the costs start rising once you go do this route and part of this project is to do things cheaply in line  with the R-Pi Project.

I was also thinking about future add-on modules for switching and signalling but that would be a future hack once I have the combo-pack up and running. Also running through my mind is the idea of using 3D printing to make custom blocks for embedding switches, LEDs and port holes to the basic Lego structure but this is down the road a ways…

Anyway some pics to come tomorrow once I am happy with the lash-up.

Table top tactics

Having spent the last couple of days unpacking boxes I reached a bit of overload and the ‘stuff’ I had accumulated over the years had mounted up. I am really quite amazed at the fact that I had all of this with me whilst living the life of a contractor and out of a suitcase pretty much. So at least I am getting to the point that I know exactly what I have although I keep thinking that I am going to uncover an unmarked box full of stock that I had forgotten all about. Like the one today, full of US Z scale stock. As I have indicated the narrowing down will help focus but what of the moment? Well thats where the table top railway comes in. A bit of fun in 00 as I found a bunch of stock that I thought had long gone. Obviously sense prevailed in the last cull 🙂 The loco and stock are no where near the same eras but hell its my railway and I don’t care. I also have a childhood Hornby J73 (I think, as its not in front of me) which will need a strip down, clean and lube and I am going to put in a Lenz decoder if it turns out to be a good runner, if not I am going to stick to DC.

The plan is, there is no plan. It is there to just get out when the mood takes and do a bit of shunting/switching using a simple dispatching method using dice, or an online dice program.. hmm that reminds me must learn some coding. Don’t plan to add to this and am going to go with the no scenery but might mock up some card buildings that can be used for the industries. I think if it can all fit into one box that will be good.

Anyway off to PLAY

00shuntingplank

Stock take 2

Ok so next up box of mainly UK N scale and some US N and some odd and sods of 009, some kits I completely forgot I had and bunch of Lenz decoders. The real surprises were the 2mmFS Peco converted wagons, some Z scale track gauges I made on a makeshift power drill lathe many years ago, Dapol Class 86 and the Dapol Grand Central HST pack with couple of coaches.. all new to me. Some of this will go as I will never model ECML and the 009 will probably go too.

Ok onwards and upwards as they say.

Stockbox2

« Older posts Newer posts »